Using the Ignite UI Bootstrap Theme Generator
The Ignite UI Bootstrap Theme Generator is a tool that creates themes that style Ignite UI and jQuery UI widgets for Bootstrap. This tutorial demonstrates how you download pre-generated themes as well as how to upload values in order to generate a custom theme.
Note: All themes are initially built from the default Bootstrap theme that is build using the LESS pre-processing language. If you would like to learn more about LESS, click here for more information.
Using a Pre-Generated Theme
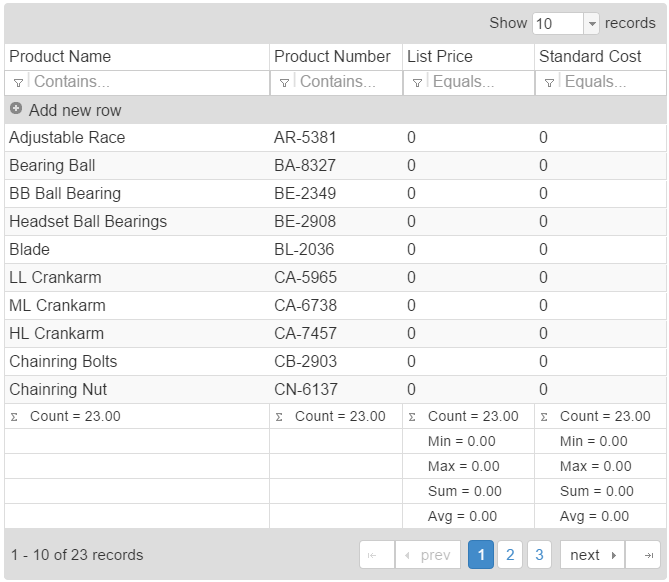
The Theme Generator site makes a number of Bootstrap-based themes available which are ready for you to download and use in your application without requiring further customization. This screenshot shows how the igGrid is rendered with the theme on the page:

Step 1: Download Theme
Navigate to the Ignite UI Bootstrap Theme Generator Default theme and click on the download button. From the available choices select the LESS, compiled CSS & images option. This action downloads a ZIP file to your machine with all the files that make up the theme.
Step 2: Reference Theme
Next, extract the theme into a location in your application (this example uses the css/themes folder). In setting up the CSS references, you also need to reference Bootstrap as well as the Ignite UI structure CSS file. The generated theme file belongs after the Bootstrap reference and before the structure file (infragistics.css). Your references should look like this:
<link href="//maxcdn.bootstrapcdn.com/bootstrap/3.2.0/css/bootstrap.min.css" rel="stylesheet" type="text/css" />
<link href="css/themes/default/infragistics.theme.css" rel="stylesheet" type="text/css" />
<link href="//cdn-na.infragistics.com/igniteui/latest/css/structure/infragistics.css"  rel="stylesheet" type="text/css" />
Note: This example shows CDN links to Bootstrap and the Ignite UI structure file. You may or may not want to use a CDN for your application.
Now when you run the page the Ignite UI and jQuery UI widgets reflect the default Bootstrap styles.
Custom Themes
Rather than just using a pre-generated theme, you may also want to use a custom theme. In those instances you have the option to upload your own LESS variables in order to generate a theme.
You could start with you own hand-written variables file or you can use another theme as a starting point. The following steps show you how to take the Cyborg theme from Bootswatch and generate a matching theme for your Ignite UI application. This is a screenshot of how the igGrid looks when styled with the Cyborg theme:

Step 1: Start with LESS Variables
Navigate to the Bootswatch Cyborg theme, click on the Download button and download the variables.less file. Once this file is copied to your computer you may elect to customize some of the values, or you can simply upload it directly to the Bootstrap Theme Generator.
Step 2: Upload Variables & Download Theme
Next, navigate to the Ignite UI Bootstrap Theme Generator upload page and click on the Upload & Finish button. This opens a file picker that allows you to navigate to the variables.less file you just downloaded from Bootswatch. Once you select the LESS file the page uploads the variables and then allows you to download the theme.
Click on the Download button and select the LESS, compiled CSS & images option to copy the theme to your computer.
Step 3: Reference Theme
Next, extract the theme into a location in your application (this example uses the css/themes folder). In setting up the CSS references, you also need to reference Bootstrap as well as the Ignite UI structure CSS file. The generated theme file belongs after the Bootstrap reference and before the structure file (infragistics.css). Your references should look like this:
<link href="//maxcdn.bootstrapcdn.com/bootstrap/3.2.0/css/bootstrap.min.css" rel="stylesheet" type="text/css" />
<link href="css/themes/cyborg/infragistics.theme.css" rel="stylesheet" type="text/css" />
<link href="//cdn-na.infragistics.com/igniteui/latest/css/structure/infragistics.css"  rel="stylesheet" type="text/css" />
Note: This example shows CDN links to Bootstrap and the Ignite UI structure file. You may or may not want to use a CDN for your application.
Now when you run the page the Ignite UI and jQuery UI widgets reflect the Cyborg theme's styles.
