This topic explains how to configure igHtmlEditor™ toolbars and buttons.
The following table lists the topics required as a prerequisite to understanding this topic.
igHtmlEditor Overview: This topic explains the features of igHtmlEditor.
Adding igHtmlEditor: This topic explains how to add igHtmlEditor to a web page.
This topic contains the following sections:
The following table lists the configurable aspects of the igHtmlEditor control toolbars. Additional details are available after the summary table.
| Configurable aspects | Details | Properties |
|---|---|---|
| Hide toolbar | Toolbars can be visible or hidden. All toolbars are initially visible.You can use the properties on the right to toggle toolbars visibility state. |
|
| Collapse toolbar | Toolbars can be expanded or collapsed. All toolbars are initially expanded. You can use the properties on the right to toggle the toolbar expanded/collapsed state. |
|
| Toggle button state | Some of the toolbar buttons can be toggled on initialization. For example bold, italic, underline buttons can be toggled on initialization |
|
| Set button tooltip | Each toolbar button has a tooltip. Use properties on the right to change the button tooltip.
Note: Tooltips are localizable. If you want to localize the igHtmlEditor
then set the locale code in the Infragistics Loader. |
|
| Configure text options | You can configure the initial text values for:
|
|
In order to hide a toolbar, set the show <toolbarName> option to false, where <toolbarName> is the name of the toolbar and can have the following values:
<CustomToolbarName>In cases where you have a custom toolbar defined, use the show <CustomToolbarName> option to set its visibility state.
The following table maps the desired configuration to option settings.
| In order to: | Use this option: | And set it to: |
|---|---|---|
| Hide text toolbar | showTextToolbar | false |
| Hide formatting toolbar | showFormattingToolbar | false |
| Hide insert object toolbar | showInsertObjectToolbar | false |
| Hide copy paste toolbar | showCopyPasteToolbar | false |
| Hide custom toolbar | show <MyCustomToolbarName> |
false |
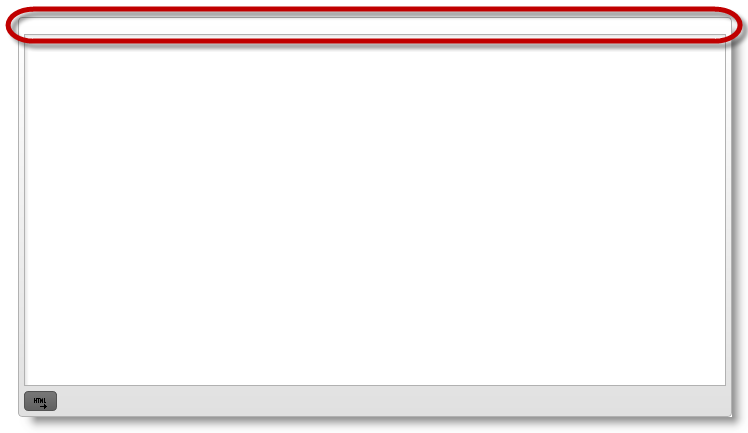
The screenshot below demonstrates how the igHtmlEditor looks as a result of the following settings:
| Property | Value |
|---|---|
| showTextToolbar | false |
| showFormattingToolbar | false |
| showInsertObjectToolbar | false |
| showInsertObjectToolbar | false |
show <MyCustomToolbarName> |
false |

The toolbar area is empty because all the standard toolbars are hidden. Here is the code to accomplish this:
In JavaScript:
$('#htmlEditor').igHtmlEditor({
    showTextToolbar: false,
    showFormattingToolbar: false,
    showInsertObjectToolbar: false,
    showCopyPasteToolbar: false,
    showMyCustomToolbar: false,
    customToolbars: [{
        name: "myCustomToolbar",
        // myCustomToolbar definition
    }]
});
In order to initially collapse the text toolbar, set the isExpanded option to false. You need to define an object literal in toolbarSettings and set its name option to the name of the toolbar. Then, use the isExpanded option to expand/collapse the toolbar.
Toolbar names:
<customToolbarName>where <customToolbarName> is the name of the custom toolbar.
The following table maps the desired configuration to property settings.
| In order to: | Use this property: | And set it to: |
|---|---|---|
| Collapse text toolbar | isExpanded | false |
| Collapse formatting toolbar | isExpanded | false |
| Collapse insert object toolbar | isExpanded | false |
| Collapse copy paste toolbar | isExpanded | false |
| Collapse custom toolbar | isExpanded | false |
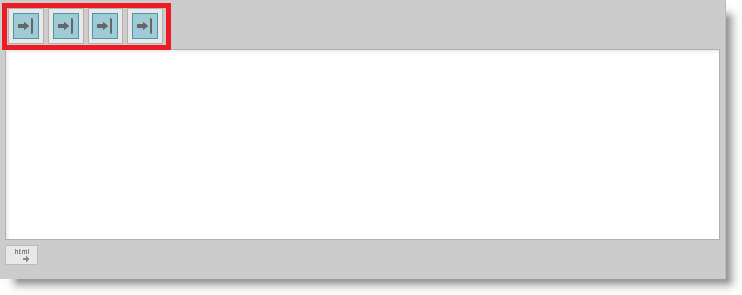
The screenshot below demonstrates how the igHtmlEditor looks as a result of the following settings:
| Property | Value |
|---|---|
| isExpanded | false |

In the example above, the standard toolbars are collapsed. Here is the code to accomplish this:
In JavaScript:
$('#htmlEditor').igHtmlEditor({
    toolbarSettings: [
    {
        name: "textToolbar",
        isExpanded: false
    },
    {
        name: "formattingToolbar",
        isExpanded: false
    },
    {
        name: "insertObjectToolbar",
        isExpanded: false
    },
    {
        name: "copyPasteToolbar",
        isExpanded: false
    }],
    customToolbars: [{
        name: "myCustomToolbar",
        isExpanded: false,
        // myCustomToolbar settings
    }]
});
Some of the buttons in the toolbars can be toggled. Toggling options are in the respective toolbar object.
The following table maps the desired configuration to property settings.
In the text toolbar object:
| In order to: | Use this property: | And set it to: |
|---|---|---|
| Toggle Bold button on | isBold | true |
| Toggle Italic button on | isItalic | true |
| Toggle Underline button on | isUnderline | true |
| Toggle Strikethrough button on | isStrikethrough | true |
In Formatting toolbar:
| In order to: | Use this property: | And set it to: |
|---|---|---|
| Toggle Justify left button on | isJustifyleft | true |
| Toggle Justify right button on | isJustifyright | true |
| Toggle Justify center button on | isJustifycenter | true |
| Toggle Justify full button on | isJustifyfull | true |
Note: Only one text alignment option will be applied i.e. they are mutually exclusive.
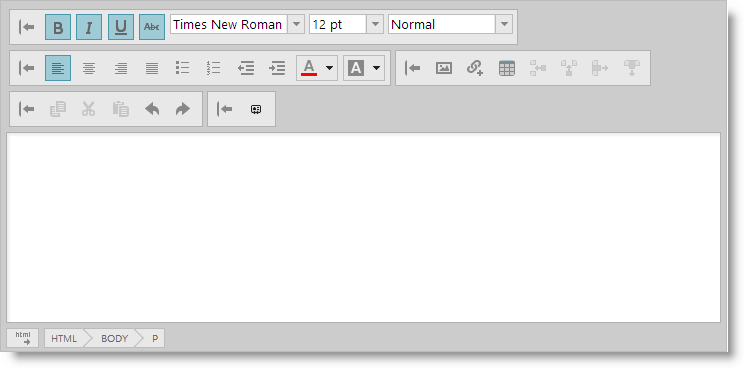
The screenshot below demonstrates how the igHtmlEditor looks as a result
of the following settings:
| Property | Value |
|---|---|
| isJustifycenter | true |
| isBold | true |
| isItalic | true |
| isUnderline | true |
| isStrikethrough | true |

In the example above, all text toolbar buttons which can be toggled are pressed because they work independently from each other. For the formatting toolbar, only the isJustifycenter option is toggled on. Here is the code which accomplishes this:
In JavaScript:
$('#htmlEditor').igHtmlEditor({
    toolbarSettings: [
    {
        name: "textToolbar",
        isBold: true,
        isItalic: true,
        isUnderline: true,
        isStrikethrough: true
    },
    {
        name: "formattingToolbar",
        isJustifycenter: true,
    }]
});
Each toolbar button has a tooltip. Here is a list of buttons and their respective properties grouped by toolbar.
Note: Tooltips are localizable. If you just want to localize
igHtmlEditorthe set you locale code in the Infragistics loader..
The following table maps the desired configuration to option settings.
In Text toolbar object:
| In order to: | Use this option: | And set it to: |
|---|---|---|
| Set Bold button tooltip | boldButtonTooltip | "Bold" |
| Set Italic button tooltip | italicButtonTooltip | "Italic" |
| Set Underline button tooltip | underlineButtonTooltip | "Underline" |
| Set Strikethrough button tooltip | strikethroughButtonTooltip | "Strikethrough" |
| Set Decrease font button tooltip | decreaseFontButtonTooltip | "Decrease font" |
| Set Increase font button tooltip | increaseFontButtonTooltip | "Increase font" |
In Formatting toolbar:
| In order to: | Use this property: | And set it to: |
|---|---|---|
| Set Align Text Left button tooltip | justifyleftButtonTooltip | "Align Text Left" |
| Set Align Text Center button tooltip | justifycenterButtonTooltip | "Center" |
| Set Align Text Right button tooltip | justifyrightButtonTooltip | "Align Text Right" |
| Set Justify button tooltip | justifyfullButtonTooltip | "Justify" |
In Insert object toolbar object:
| In order to: | Use this property: | And set it to: |
|---|---|---|
| Set Insert Picture button tooltip | imageButtonTooltip | "Insert Picture" |
| Set Insert Hyperlink button tooltip | linkButtonTooltip | "Insert Hyperlink" |
| Set Table button tooltip | tableButtonTooltip | "Table" |
| Set Add Row button tooltip | addRowButtonTooltip | "Add Row" |
| Set Add Column button tooltip | addColumnButtonTooltip | "Add Column" |
| Set Remove Row button tooltip | removeRowButtonTooltip | "Remove Row" |
| Set Remove Column button tooltip | removeColumnButtonTooltip | "Remove Column" |
In Copy paste toolbar object:
| In order to: | Use this property: | And set it to: |
|---|---|---|
| Set Copy button tooltip | copyButtonTooltip | "Copy" |
| Set Cut button tooltip | cutButtonTooltip | "Cut" |
| Set Paste button tooltip | pasteButtonTooltip | "Paste" |
| Set Undo button tooltip | undoButtonTooltip | "Undo" |
| Set Redo button tooltip | redoButtonTooltip | "Redo" |
The following example shows how to set buttons tooltips:
In JavaScript:
$('#htmlEditor').igHtmlEditor({
    toolbarSettings: [
    {
        name: "textToolbar",
        boldButtonTooltip: "Bold",
        italicButtonTooltip: "Italic",
        underlineButtonTooltip: "Underline",
        strikethroughButtonTooltip: "Strikethrough",
        decreaseFontButtonTooltip: "Decrease font",
        increaseFontButtonTooltip: "Increase font",
    },
    {
        name: "formattingToolbar",
        justifyleftButtonTooltip: "Align Text Left",
        justifycenterButtonTooltip: "Center",
        justifyrightButtonTooltip: "Align Text Right",
        justifyfullButtonTooltip: "Justify"
    },
    {
        name: "insertObjectToolbar",
        imageButtonTooltip: "Insert Picture",
        linkButtonTooltip: "Insert Hyperlink",
        tableButtonTooltip: "Table",
        addRowButtonTooltip: "Add Row",
        addColumnButtonTooltip: "Add Column",
        removeRowButtonTooltip: "Remove Row",
        removeColumnButtonTooltip: "Remove Column"
    },
    {
        name: "copyPasteToolbar",
        copyButtonTooltip: "Copy",
        cutButtonTooltip: "Cut",
        pasteButtonTooltip: "Paste",
        undoButtonTooltip: "Undo",
        redoButtonTooltip: "Redo"
    }
    ]
});
You can configure text options for:
The following table maps the desired configuration to option settings.
| In order to: | Use this option: | And set it to: |
|---|---|---|
| Set text font family | selectedFontFamily | "Georgia" |
| Set text font size | selectedFontSize | "4" |
| Set text color | selectedTextColor | "black" |
| Set text back color | selectedTextBackgroundColor | "white" |
| Set text format (heading) | selectedFormat | "h2" |
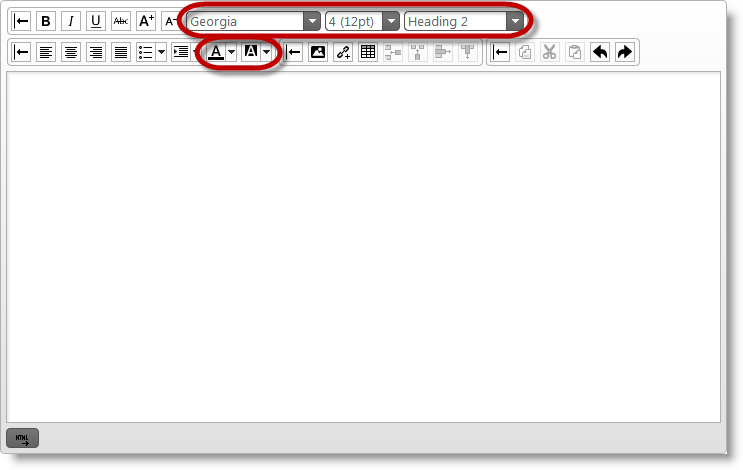
The screenshot below demonstrates how the igHtmlEditor looks as a result
of the following settings:
| Property | Value |
|---|---|
| selectedFontFamily | "Georgia" |
| selectedFontSize | "4" |
| selectedTextColor | "black" |
| selectedTextBackgroundColor | "white" |
| selectedFormat | "h2" |

Here is the code which accomplishes this:
In JavaScript:
$('#htmlEditor').igHtmlEditor({
    toolbarSettings: [
    {
        name: "textToolbar",
        selectedFontFamily: "Georgia",
        selectedFontSize: "4",
        selectedFormat: "h2"
    },
    {
        name: "formattingToolbar",
        selectedTextColor: "black",
        selectedTextBackgroundColor: "white"
    },
    ]
});
The following topics provide additional information related to this topic.
Saving the HTML Content Programmatically: This topic explains how to save igHtmlEditor content to a web server.
Modifying Contents Programmatically: This topic explains how to modify the igHtmlEditor contents by using the API.
The following samples provide additional information related to this topic.
Edit Content: In this forum post example, an initial piece of content provided in the HTML Editor.
Custom Toolbars and Buttons: This sample demonstrates how the HtmlEditor control works as an email client. This implementation features a custom toolbar where you can add a signature to the message.
API and Events: This sample demonstrates how to handle events in the Html Editor control and API usage.
View on GitHub